SharePoint is a tool that empowers business users to setup and design sites with little or no code knowledge. Using tools like SharePoint Designer to create workflows, or the new Power Automate and Power Apps tools, the barriers for creating robust applications have been removed. With everyone looking to incorporate AI into their business, SharePoint has come and provided several low code solutions with their Power Platform tools, such as users can create sentiment analysis tools, language detection, and even text translation apps using the platform. There is still a barrier into the Power Platform that requires some logic to design and query resources, but those with an understanding of Excel formulas should find the process similar.
Any SharePoint architect will tell you that metadata is important for creating well structure search schemas, but sometimes the amount of meta data needed is cumbersome to end users. What if a way to extract and auto tag documents is needed, there must be an easier way than a power app to achieve this, which is where SharePoint Syntex comes in. SharePoint Syntex can be thought of as a content type hub that allows for auto tagging of documents by just uploading the document to a library.
It is important to know before using SharePoint Syntex, you must purchase an additional license for each user using the service and Power Automate credits.
Setting up a Content Center
To begin using SharePoint Syntex, you must setup a content center to hold and host your Syntex content types. Just like the old content type hubs, this is done by creating a new site collection. In the SharePoint admin screen, create a new site collection and select the template "Content Center". If you do not see this option, make sure you have activated the service from the admin portal under setup then activating Automate Content Understanding. On a developer tenant the service is already available, however you will not be able to publish the content type as Microsoft will not sell you the license needed to do that on the developer tenant.
Creating a model
Once the site is created, navigate to the site collection. To create the first understanding model, at the top you have a list of options, selecting the "Document understanding model"
Since we are creating this in 5 minutes, I am going to use one of the preexisting models provided by Microsoft. There are 2 models; Invoices and Receipts. To train our model, we must have samples. The more samples the better the training model, your samples should also include documents that are NOT invoices to make sure it doesn't recognize them. Since we are using the prebuilt model our content type is setup with invoice fields (invoice number, date, amount, etc). To use a custom understanding model you will create columns and then highlight on the document where the data is found for the extractor to learn what to look for. This will be covered in a later blog post.
The screen for our model is pretty straight forward, the first step in the process is to analyze our files. To do this, you will upload the samples mentioned above.
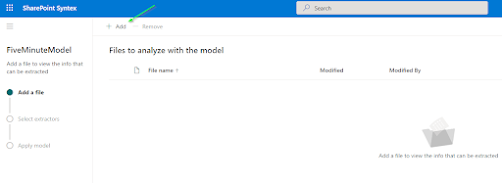
In the analyze section we will see a document library to hold the files used for analyzing and training, only upload the documents that are invoices as the analyzing step is confirming data is being found correctly. Click add at the top upload your documents.
With your samples loaded, highlight the ones you want to analyze and click add.
Now at the bottom of your library, click next to start the analyzation of the documents.
Clicking next will start the analyzing process. Once complete, a screen with the document and the properties found show up. This is where you tell Syntex if it found the correct items and that they should be extracted. clicking each item under extractor Syntex will ask you if it is the correct extractor. Saying yes can happen two ways either selecting yes for each extractor, or clicking the extract check box. clicking no will flag the extractor as wrong so anything that is not found correctly select no from the popup. Once complete hit next at the bottom of the screen
The invoice SharePoint Syntex Extractor is complete. The final step would be to apply the extractor to a library.
To make sure you model works on other documents and does not work on documents it shouldn't additional files can be added to the "Training Files" library, and when we run the extractor we can see the prebuilt model only finds the business name, which to me shows the model is ready for production. if dates or items were found that should not match, more training items are needed.
SharePoint, SharePoint Syntex, AI, Artificial Intelligence, NLP, Natural Language Processing, Syntex, supervised learning, Microsoft, O365, Office 365, SharePoint Online


%20-%20Microsoft%20Visual%20Studio.png)


%20-%20Microsoft%20Visual%20Studio.png)


No comments:
Post a Comment